Hello everyone, I’m currently facing an issue in obtaining a closed surface for the segmentation output of the attached MRI breast image. The algorithm’s objective is to segment the breast (body). As you can see, the surface lacks smoothness due to the points not being connected. I attempted using a smoothing algorithm with high sigmas, but there was minimal improvement. Here’s the code responsible for segmenting the breast body.
import SimpleITK as sitk

# Load the MRI image
image_path = '16_breast_image.nrrd'
image = sitk.ReadImage(image_path)

# Create an empty segmentation image with the same size and metadata
segmentation_image = sitk.Image(image.GetSize(), sitk.sitkUInt8)
segmentation_image.CopyInformation(image)

# Define a threshold to distinguish between object and background
threshold = 40  # You can adjust this threshold based on your image characteristics

# Iterate through the image to find the first non-zero voxel
for k in range(segmentation_image.GetDepth()):
    for j in range(segmentation_image.GetHeight()):
        for i in range(segmentation_image.GetWidth()):
            intensity = image.GetPixel(i, j, k)

            # Check if the voxel corresponds to an object (not background)
            if intensity > threshold:
                # Set the corresponding voxel in the segmentation image to 255 (white)
                segmentation_image.SetPixel(i, j, k, 1)
                break

# Iterate through the image to find the first non-zero voxel in the reverse direction
for k in range(segmentation_image.GetDepth() - 1, -1, -1):
    for j in range(segmentation_image.GetHeight() - 1, -1, -1):
        for i in range(segmentation_image.GetWidth() - 1, -1, -1):
            intensity = image.GetPixel(i, j, k)

            # Check if the voxel corresponds to an object (not background)
            if intensity > threshold:
                # Set the corresponding voxel in the reverse segmentation image to 255 (white)
                segmentation_image.SetPixel(i, j, k, 1)
                break
Looking at your code, you are performing simple thresholding. In Python you should pretty much avoid iterating whenever possible. In this case, it’s easy to threshold the whole image, then smooth the result using the AntiAliasBinaryImageFilter followed by extraction of the zero level set using the ZeroCrossingImageFilter.
You may want to consider using an automatically detected threshold, if possible (e.g. the OtsuThresholdImageFilter, other methods are available, see this notebook, search for threshold_filters). See code below:
import SimpleITK as sitk

image_path = '16_breast_image.nrrd'

image = sitk.ReadImage(image_path)

# segment using manually set threshold
threshold = 40
segmentation = image > threshold

#segment using Otsu threshold, assumes bi-modal distribution,
#foreground-background content
#foreground_value=1
#background_value=0
#segmentation = sitk.OtsuThreshold(image, background_value, foreground_value)

# smooth the image and then extract the zero level set
level_set_image = sitk.AntiAliasBinary(segmentation, maximumRMSError = 0.07, numberOfIterations = 1000)
smoothed_segmentation = sitk.ZeroCrossing(level_set_image)
I appreciate your feedback. The code I’ve written incorporates an algorithm that identifies and marks the initial pixel encountered within the image using raster order. This approach ensures the segmentation of the outer body itself. Please note that this method differs from a conventional threshold filter.
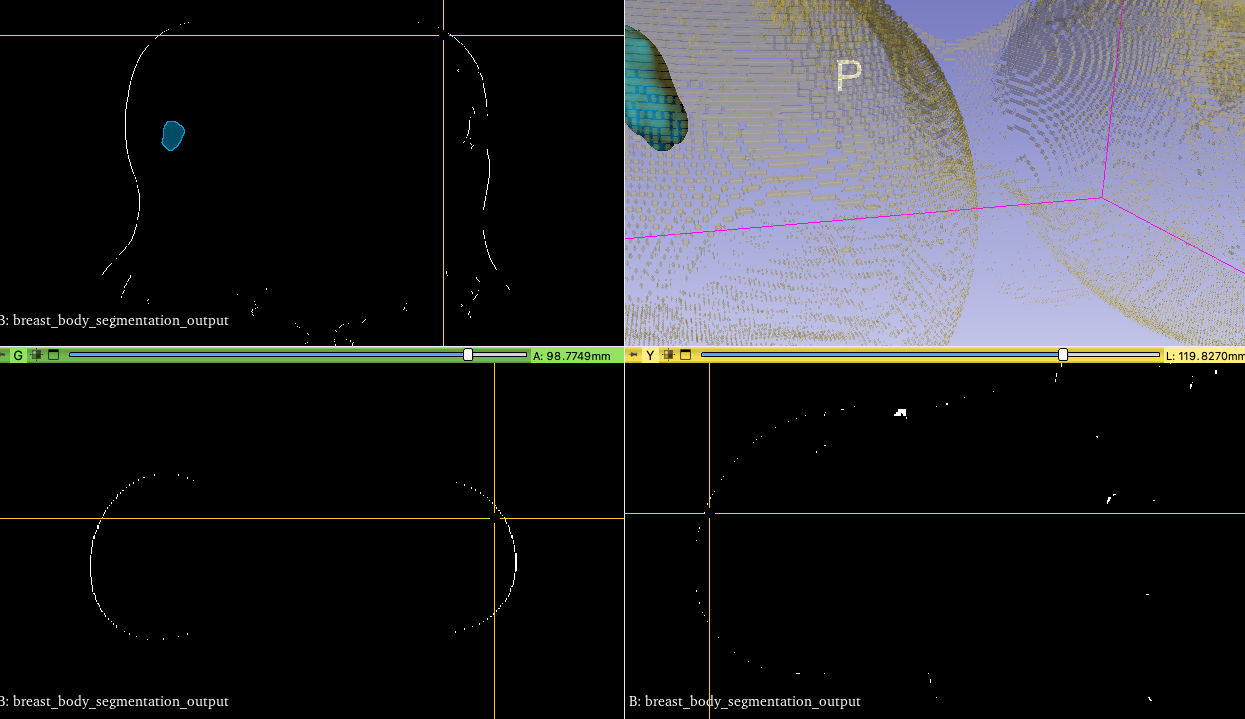
In any case, I’ve included the result image generated by the algorithm. Despite attempting smoothing and closing operations, I have been unsuccessful in achieving a fully closed surface due to numerous unconnected points that are missing.
Thank you,
Miri breast_body_segmentation_output.nii.gz (155.5 KB)
What you want to do is not trivial (i.e. not a single filter). Possibly try Slicer’s surface wrap solidify functionality. Try it via Slicer’s GUI and if this solves your issue, look at the code to get the details.