Introduction
We have added a new module to the Insight Toolkit (ITK) to perform Structure Preserving Color Normalization on an H & E image using a reference image. The software is available in C++ and is also packaged for Python.
H & E (hematoxylin and eosin) are stains used to color parts of cells in a histological image, often for medical diagnosis. Hematoxylin is a compound that stains cell nuclei a purple-blue color. Eosin is a compound that stains extracellular matrix and cytoplasm pink. However, the exact color of purple-blue or pink can vary from image to image, and this can make comparison of images difficult. This routine addresses the issue by re-coloring one image (the first image supplied to the routine) using the color scheme of a reference image (the second image supplied to the routine).
Structure Preserving Color Normalization is a technique described in Vahadane et al., 2016 and modified in Ramakrishnan et al., 2019. The idea is to model the color of an image pixel as something close to pure white, which is reduced in intensity in a color-specific way via an optical absorption model that depends upon the amounts of hematoxylin and eosin that are present. Non-negative matrix factorization is used on each analyzed image to simultaneously derive the amount of hematoxylin and eosin stain at each pixel and the image-wide effective colors of each stain.
The implementation in ITK accelerates the non-negative matrix factorization by choosing the initial estimate for the color absorption characteristics using a technique mimicking that presented in Arora et al., 2013 and modified in Newberg et al., 2018. This approach finds a good solution for a non-negative matrix factorization by first transforming it to the problem of finding a convex hull for a set of points in a cloud.
Installation for Python
ITKColorNormalization and all its dependencies can be easily installed with Python wheels. Wheels have been generated for macOS, Linux, and Windows and several versions of Python, 3.5, 3.6, 3.7, and 3.8. If you do not want the installation to be to your current Python environment, you should first create and activate a Python virtual environment (venv) to work in. Then, run the following from the command-line:
pip install itk-spcn
Launch python, import the itk package, and set variable names for the input images
import itk
input_image_filename = 'path/to/image_to_be_normalized'
reference_image_filename = 'path/to/image_to_be_used_as_color_reference'
Usage in Python
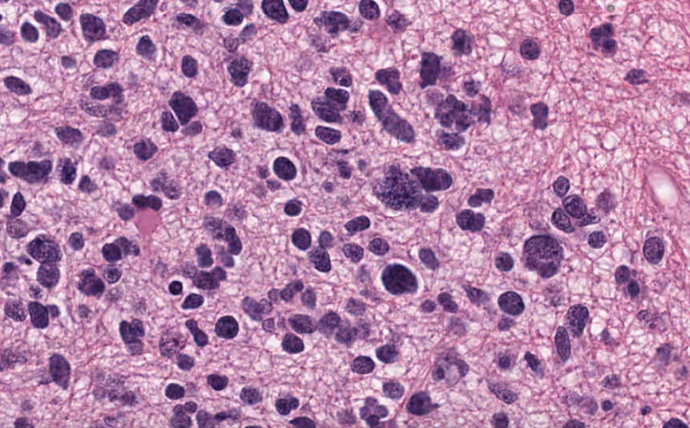
The following example transforms this input image
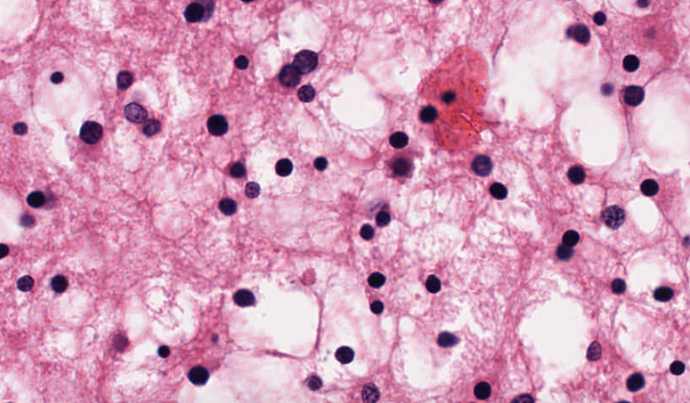
using the color scheme of this reference image
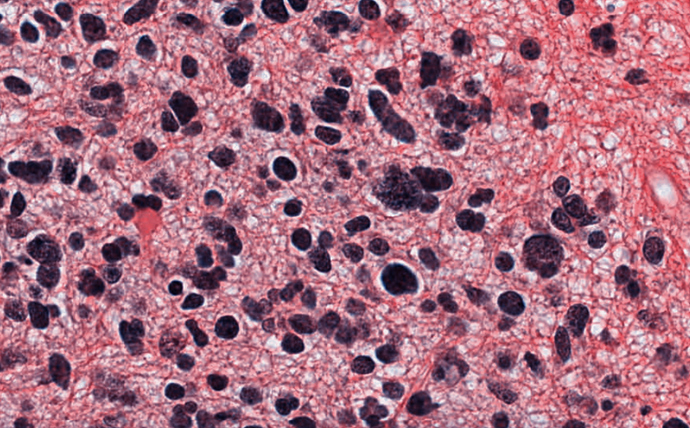
to produce this output image
Functional interface to ITK
You can use the functional, eager interface to ITK to choose when each step will be executed as follows. The input_image and reference_image are processed to produce normalized_image, which is the input_image with the color scheme of the reference_image. The color_index_suppressed_by_hematoxylin and color_index_suppressed_by_eosin arguments are optional if the input_image pixel type is RGB or RGBA. Here you are indicating that the color channel most suppressed by hematoxylin is 0 (which is red for RGB and RGBA pixels) and that the color most suppressed by eosin is 1 (which is green for RGB and RGBA pixels); these are the defaults for RGB and RGBA pixels.
input_image = itk.imread(input_image_filename)
reference_image = itk.imread(reference_image_filename)
eager_normalized_image = itk.structure_preserving_color_normalization_filter(
    input_image,
    reference_image,
    color_index_suppressed_by_hematoxylin=0,
    color_index_suppressed_by_eosin=1)

itk.imwrite(eager_normalized_image, output_image_filename)
ITK pipeline interface
Alternatively, you can use the ITK pipeline infrastructure that waits until a call to Update() or Write() before executing the pipeline. The function itk.StructurePreservingColorNormalizationFilter.New() uses its argument to determine the pixel type for the filter; the actual image is not used there but is supplied with the spcn_filter.SetInput(0, input_reader.GetOutput()) call. As above, the calls to SetColorIndexSuppressedByHematoxylin and SetColorIndexSuppressedByEosin are optional if the pixel type is RGB or RGBA.
input_reader = itk.ImageFileReader.New(FileName=input_image_filename)
reference_reader = itk.ImageFileReader.New(FileName=reference_image_filename)

spcn_filter = itk.StructurePreservingColorNormalizationFilter.New(Input=input_reader.GetOutput())
spcn_filter.SetColorIndexSuppressedByHematoxylin(0)
spcn_filter.SetColorIndexSuppressedByEosin(1)
spcn_filter.SetInput(0, input_reader.GetOutput())
spcn_filter.SetInput(1, reference_reader.GetOutput())

output_writer = itk.ImageFileWriter.New(spcn_filter.GetOutput())
output_writer.SetInput(spcn_filter.GetOutput())
output_writer.SetFileName(output_image_filename)
output_writer.Write()
Note that if spcn_filter is used again with a different image, for example from a different reader,
spcn_filter.SetInput(0, input_reader2.GetOutput())
but the reference_image is unchanged then the filter will use its cached analysis of the reference_image, which saves about half the processing time.


