In modern computing, the Web Platform has transformed web browsers into a powerful and accessible application interface. Applications built on open web standards work, with no installation, across operating system and hardware platforms. WebAssembly, also known as Wasm, is a portable, binary format for high-performance applications on the web. Wasm has additional properties critical for the web: tiny binary sizes and strong, security-driven sandboxed execution. Wasm’s capabilities became even more universal with with the creation of the WebAssembly System Interface, WASI, open standard. WASI enables Wasm to run outside the browser in contexts such as the command line, embedded environments, and within higher level programming languages.
itk-wasm combines the Insight Toolkit (ITK) and WebAssembly to enable high-performance spatial analysis in a web browser, Node.js, and reproducible execution across programming languages and hardware architectures.
In this post, adapted from itk-wasm’s documentation, we provide a C++ Wasm Hello World tutorial. At the end of this tutorial you will have built and executed C++ code to Wasm for standalone execution on the command line and in the browser.
Let’s get started! ![]()
Preliminaries
Before getting started, make sure Node.js and Docker are installed. On Linux, make sure you can run docker without sudo. On Windows, we recommend WSL 2 with Docker enabled.
While we recommend following along step-by-step, the complete example can also be found in the examples/ directory of the project repository.
Write the code
First, let’s create a new directory to house our project.
mkdir HelloWorld
cd HelloWorld
Let’s write some code! Populate hello.cxx with our Hello World program:
#include <iostream>

int main() {
  std::cout << "Hello Wasm world!" << std::endl;
  return 0;
}
Next, provide a CMake build configuration at CMakeLists.txt:
cmake_minimum_required(VERSION 3.16)
project(HelloWorld)

add_executable(hello hello.cxx)
Install itk-wasm
We use the add_executable command to build executables with itk-wasm. The Emscripten and WASI toolchains along with itk-wasm build and execution configurations are contained in itk-wasm dockcross Docker images invoked by the itk-wasm command line interface (CLI). Note that the same code can also be built and tested with native operating system toolchains. This is useful for development and debugging.
Build the program with the itk-wasm CLI, itk-wasm. This is shipped with the itk-wasm Node.js package. First install itk-wasm with the Node Package Manager, npm, the CLI that ships with Node.js.
# Initialize an empty project in the current directory
❯ npm init --yes
❯ npm install itk-wasm@1.0.0-b.70
Run on the command line
Build the project with the WASI itkwasm/wasi toolchain in the ./wasi-build/ directory:
❯ npx itk-wasm -i itkwasm/wasi -b ./wasi-build/ build
A hello.wasi.wasm WebAssembly binary is built in the ./wasi-build/ directory.
❯ ls wasi-build
build.ninja          CMakeFiles          libwasi-exception-shim.a
cmake_install.cmake  hello.wasi.wasm
Execute the binary with the run itk-wasm subcommand.
❯ npx itk-wasm -b ./wasi-build/ run hello.wasi.wasm
Hello Wasm world!
Congratulations! You just executed a C++ program compiled to WebAssembly. ![]()
The binary can also be executed with other WASI runtimes.
Run in the browser
For Node.js or the Browser, build the project with the default Emscripten toolchain.
❯ npx itk-wasm -b ./emscripten-build build
The same Emscripten Wasm module can be executed in a web browser.
Create an HTML file that will call the Wasm module through JavaScript and display
its output in the HTML DOM:
<!DOCTYPE html>
<html>
  <head>
    <title>itk-wasm Browser Hello World!</title>
    <meta charset="UTF-8" />
    <script src="https://cdn.jsdelivr.net/npm/itk-wasm@1.0.0-b.53/dist/umd/itk-wasm.min.js"></script>
  </head>

  <body>
    <textarea readonly>WebAssembly output...</textarea>

    <script>
      const outputTextArea = document.querySelector("textarea");
      outputTextArea.textContent = "Loading...";

      const wasmURL = new URL('emscripten-build/hello', document.location)
      const args = []
      const inputs = null
      const outputs = null
      itk.runPipeline(null, wasmURL, args, inputs, outputs).then(
        ({ stdout, webWorker }) => {
          webWorker.terminate()
          outputTextArea.textContent = stdout
          })
    </script>
  </body>
</html>
Serve the web page and Wasm module with an http server:
❯ npm install http-server
❯ npx http-server .
And point your browser to http://127.0.0.1:8080/.
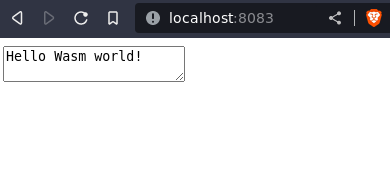
Congratulations! You just executed a C++ program in your web browser. ![]()
What’s Next
Well done!
As you build more advanced C++ projects into WebAssembly, you will find that many CMake-configured projects will just work with itk-wasm since it handles details required for CMake try_run commands, C++ exception handling, optimization of Wasm binary size, etc.
In the next tutorial, we will introduces itk-wasm’s ability to elegantly transform standalone C++ command line programs into powerful Wasm modules with a simple, efficient interface.